
Sometimes the PS4 controllers have a lot of problems playing our games. For example, if we want to move the player straight while playing a shooting game, the player is moving Auto Right or Left.
I'm going to show you how to fix this issue by cleaning the inside of the analog stick -
More Tech Stories For You:
- Why the Nintendo PlayStation is worth to such an extent
- Top 5 144Hz Gaming Monitor for Extreme Gamers
- This 9 New Best Android Apps Ever in 2020
1. No soldering is required, this may also help resolve similar issues you are having with the analog stick.
2. we need to go deep inside the controller lay the controller upside down on a soft surface. I don't recommend doing this around the carpet as tiny pieces may fall off and become lost.
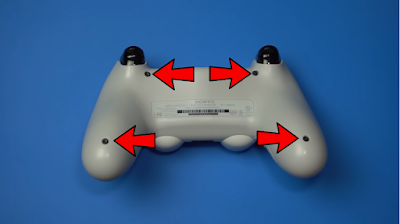
3. Take out the four screws on the back with a small Phillips screwdriver.

4. Gently separate the two shelves there's a ribbon cable between them. So, don't pull them too far apart.
5. My version of the controller has a little strip of plastic that goes between the shorter buttons, other versions do not. that strip is part of the back shelf you'll want to slip it out through the R2 and L2 buttons carefully. if the buttons get yanked off just set them aside you'll reattach them later.

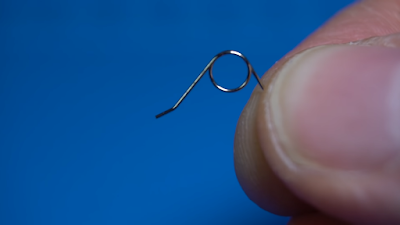
6. The other things may also fall off during the process When You Fix Your Controller, like this tiny piece or these tiny Springs, set them aside if they do.

7. Remove the ribbon cable it comes right out of the socket if you pull this little blue tab.
8. You may see marginal differences in the way the inside of the controller looks depending on what version, you have so just keep that in mind.

9. Remove the battery cable connector. it has two pieces of plastic stuck tightly together separate it by grabbing the top two sides and pulling upward. if your fingers are up to the task go ahead and use a tool.


10. Take the battery out, snap out the battery plate. it's held onto the board by two plastic pegs. Disconnect this Blue cable or Your Colour Cable for some versions the cable can be disconnected by pulling it straight out, others like mine have a little clamp that needs to be moved in the up position before removing the cable, This is a fragile cable so be very careful.
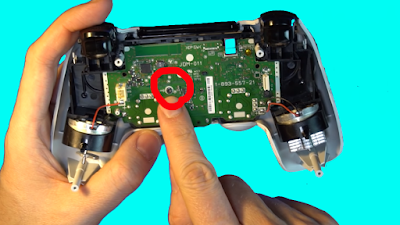
11. Remove the screw that holds the board in. separate the front plate from everything else. for some versions, the ribbon cable will need to be fed out through the black plastic.

12. The reset and share buttons may fall out if so set them aside.
13. There should be a lot of dust inside so blow off everything. especially the analog sticks pull off the analog sticks and blow off the area underneath.

14. We will be opening the two green chambers attached to the analog stick. The one that has the issue, these chambers have little metal legs that are attached to the circuit board. take a very small flathead screwdriver and pry open the top of one of them. which in turn bends the legs.
15. The tab is snapped into place by tiny parts and will unsnap as you pry it away.

16. Remove the white disk inside set it aside and don't mess with it. It has tiny metal contacts on it and you want to do your best not to bend those contacts.

17. Dip a cotton swab and alcohol and clean where the disc was, do not leave any smudges behind.

18. Let everything dry put the disk back into place. it has to go in a certain way the side with. the too close together dots need to be at the bottom of the chamber. the best way to do it is to hang the disk on the little orange nose coming out of the analog stick, your colors may differ from mine.
19. Close the door and snap it back into place it takes a good deal of force but if it's taking too much force open the door back up and reposition the disk. Make sure you don't have it flipped The wrong way, you'll feel a snap when the door shuts properly.
20. Clean the other chamber of the same analog stick. since you're in there you might as well clean anything else you see that needs cleaning.
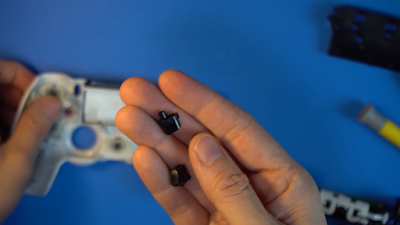
21. Put the analog sticks back on. put the share or options button back into position if they fell out. they have them shaped a certain way. so it's impossible to put them in the wrong way.
22. Place the board back into the shell. on some versions like mine, you'll have to feed the cable back up through the slot on the black plastic.
23. Reattach the ribbon cable, screw the board into place, snap the battery plate back.
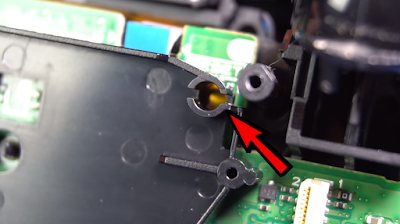
24. On some versions have this piece which may have fallen out it's a reset button and it goes right here put it back in.
25. Place the battery back into position and connect its cable. make sure the cable is pushed all the way in.

26. Connect the ribbon. decide what the silvered wire traces need to face the battery. if the l2 R2 buttons fell off snap them back into place. if the spring fell off - that needs to be placed onto the rod that's coming out from the side of the button.
27. In one leg of the spring needs to go in this tiny slot.
28. There is a corresponding slot on the l1 and r1 buttons the other leg will need to be in that slot as you snap it back on.
29. It's very tricky and may take multiple attempts you know you'll have succeeded when the l2 and r2 buttons spring back into position when you press them.
30. Put the two halves back together everything should snap into place.
31. Before putting the screws back in a test the controller. be sure to test the shorter buttons too. if something still isn't working correctly go back in and check everything.
32. it's possible that the metal contacts on the disk may have been flattened during the process. it may help to pull them up a little bit. if all else fails to swap the disk with another one from another analog stick. like from a controller.
you have laying around for parts please add any additional tips you have to the comments section.
Analysis By - Ifti Ahmed

Post a Comment